A blood glucose monitor kit typically contains a glucose meter, a lancing device, lancets, a small supply of test strips, a carrying case, and a quick start guide. In the United States, every meter in these kits must be FDA-cleared and meet the ISO 15197:2013 accuracy standard. The right kit is the one that fits your clinical needs, is easy to use consistently, and comes from a manufacturer with strong independent accuracy data.
What Is Inside a Typical Kit
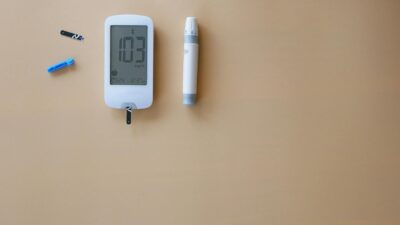
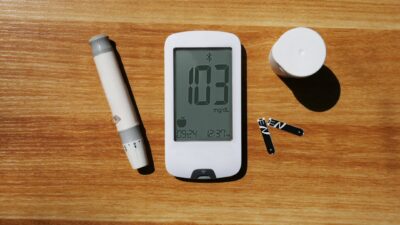
Most starter kits from major brands such as Accu-Chek, Contour, OneTouch, and FreeStyle are designed to let a new user test glucose within minutes of opening the box. Contents vary, but a representative kit includes the following items.
- Glucose meter — the electronic reader that displays results in mg/dL.
- Lancing device — a spring-loaded handheld tool that drives a lancet into the fingertip.
- Lancets — sterile single-use needles, typically 10 to 25 per starter kit.
- Test strips — disposable strips that react with a blood drop; 10 strips is a common starter supply.
- Carrying case — a zippered pouch or hardshell case for travel and storage.
- Batteries — either installed in the meter or packed separately.
- Quick start guide — short instructions covering setup, testing, and error codes.
Some kits also include control solution, a logbook, a USB cable for meters with rechargeable batteries or data syncing, and a Bluetooth pairing card for app-enabled meters.
FDA Accuracy Standards
The FDA regulates home blood glucose monitors as medical devices under its 510(k) pathway. Current guidance for self-monitoring systems aligns with ISO 15197:2013. Under that standard, 95 percent of measured values must be within 15 mg/dL of the reference value when the reference is below 100 mg/dL, and within 15 percent when the reference is 100 mg/dL or above. In addition, 99 percent of results must land within clinically acceptable zones on the Consensus Error Grid. The FDA medical devices portal details the guidance documents.
Clearance is a floor, not a ceiling. Independent studies periodically publish comparative accuracy results; meters like the Contour Next and Accu-Chek Guide consistently perform above the minimum bar, while some generic options meet the standard only narrowly. Choosing a kit from a brand with strong independent testing data is a reasonable starting point.
How to Use a Blood Glucose Monitor Kit
Good technique is more important than brand for most users. Follow a consistent routine each time you test:
- Wash hands in warm, soapy water and dry completely. Residual sugar from fruit or lotion can falsely elevate readings.
- Insert a fresh lancet in the lancing device and set the depth dial.
- Insert a test strip into the meter; it should power on automatically.
- Press the lancing device firmly to the side of a fingertip and trigger it.
- Gently encourage a full hanging drop of blood without squeezing the finger, which brings in tissue fluid.
- Touch the drop to the strip’s sample area until the meter indicates it has enough blood.
- Read the result, log it, and dispose of the lancet in an FDA-cleared sharps container.
Comparing Popular Kits
Kits differ in strip cost, app support, and data-display features. The table below offers a general comparison of widely available options.
| Kit | Sample size | Connectivity | Strip cost (approximate) | Notable features |
|---|---|---|---|---|
| Contour Next One | 0.6 microliter | Bluetooth | Moderate | Second-chance sampling; strong accuracy |
| Accu-Chek Guide | 0.6 microliter | Bluetooth | Moderate | Spill-resistant vial; meal tagging |
| OneTouch Verio Reflect | 0.4 microliter | Bluetooth | Moderate | Color range indicator; coaching messages |
| ReliOn Prime or Premier | 0.5 microliter | USB on Premier | Low | Affordable strips; widely available at Walmart |
| FreeStyle Lite | 0.3 microliter | None | Moderate | Backlit display; smallest sample requirement |
Storage, Strips, and Control Solution
Test strips are the most fragile part of a kit. Each vial has an expiration date and a shorter in-use window once opened — typically 90 to 180 days. Store strips in the original sealed container at room temperature, away from humidity and direct sun. Expired or humidity-damaged strips are a leading cause of unreliable readings.
Control solution is a liquid that contains a known glucose concentration. Place a drop on a strip to confirm the meter reads within the range printed on the strip vial. Manufacturers recommend running a control test when opening a new vial, suspecting a low or high reading, dropping the meter, or after temperature exposure. Our prediabetes overview explains how self-monitoring fits into broader management, while our A1C levels guide connects home meter data with long-term tracking.
Safety and Disposal
Lancets are single-use. Reusing them dulls the tip, which causes more pain and microtrauma. Store used lancets in an FDA-cleared sharps container, which most pharmacies stock, or in a heavy plastic container labeled as sharps waste. Many local public-health departments run mail-back programs or drop-off sites for full containers.
Anyone considering a full treatment plan can review our treatment hub for how self-monitoring data feeds into clinical decisions.
The Bottom Line
A blood glucose monitor kit is a starter bundle that typically includes a meter, lancing device, lancets, strips, a case, batteries, and a quick start guide. All FDA-cleared meters meet the ISO 15197 accuracy standard, but differences in real-world performance, strip cost, and app features make brand and model choice meaningful. The most reliable results come from clean, dry hands, properly stored strips, and a consistent technique, with periodic A1C tests to confirm the broader picture.
Medical disclaimer: This article is for educational purposes only and is not a substitute for advice from a qualified healthcare professional. Discuss testing frequency and interpretation with your own clinician.