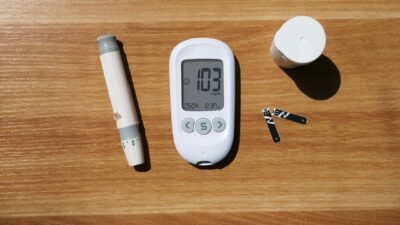
A glucose meter is a small handheld device that measures your blood sugar from a drop of blood — usually pricked from a fingertip — and gives you a result in seconds. Home glucose meters have been the mainstay of diabetes self-monitoring for four decades and remain essential for people who are not wearing a continuous glucose monitor (CGM). Modern meters are accurate, affordable, and easy to use.
How a Glucose Meter Works
Glucose meters use enzymatic test strips. Each strip is coated with one of two enzymes: glucose oxidase or glucose dehydrogenase. When blood contacts the strip, the enzyme reacts with glucose and creates a small electrical current proportional to the glucose concentration. The meter measures that current and converts it to a reading in mg/dL (in the US) or mmol/L (in most other countries).
Most meters need only 0.3 to 0.6 microliters of blood — smaller than the head of a pin. Results appear in 5 to 15 seconds depending on the meter.
Accuracy Standards
The FDA requires all home glucose meters sold in the United States to meet ISO 15197 accuracy standards. That means 95% of results must fall within:
- 15% of a lab reference when glucose is above 75 mg/dL
- 15 mg/dL of reference when glucose is below 75 mg/dL
According to a 2018 Diabetes Care study that tested 18 popular meters, most mainstream brands meet or exceed these criteria, though accuracy varies meter-to-meter. Pharmacy-brand meters are often just as accurate as big brand names.
What the Numbers Mean
| Situation | Normal | Prediabetes | Diabetes |
|---|---|---|---|
| Fasting | Below 100 mg/dL | 100-125 mg/dL | 126 mg/dL or higher |
| 2 hours after meal | Below 140 mg/dL | 140-199 mg/dL | 200 mg/dL or higher |
| Random (any time) | Below 140 mg/dL | 140-199 mg/dL | 200 mg/dL or higher with symptoms |
A single meter reading is a snapshot and does not confirm a diagnosis. Diabetes and prediabetes are diagnosed based on multiple lab-confirmed tests. Review our A1C levels guide for how meter readings relate to long-term averages.
How to Use a Glucose Meter Correctly
- Wash and dry your hands. Skin residue (especially sugar or fruit juice) falsely raises readings.
- Insert a fresh test strip into the meter. Check the expiration date and confirm the strip is from its original sealed vial.
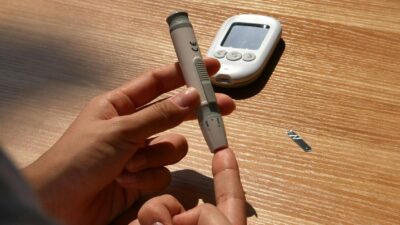
- Prick the side of a fingertip with the lancet (less painful than the pad). Warm hands briefly if circulation is poor.
- Apply the blood drop to the strip’s sample well until the meter beeps.
- Wait 5-15 seconds for the result.
- Log or sync the reading to your phone or paper log. Most modern meters Bluetooth-sync automatically.
Common Reasons for Inaccurate Readings
- Unwashed hands with food residue
- Too small a blood sample
- Expired or improperly stored strips
- Very hot or cold environment
- Severe dehydration
- Very high or very low hematocrit (blood cell percentage)
- High-dose acetaminophen, ascorbic acid, or maltose-containing IV fluids
Test your meter weekly with the provided control solution to confirm it is within range.
When to Use a Meter Vs. a CGM
Continuous glucose monitors like Dexcom G7 and Stelo offer real-time data and trend arrows, but traditional meters still have advantages:
- Lower upfront cost — meters often free through insurance, strips around $0.30-1.00 each
- No 15-day replacement cycle
- Useful as a backup to confirm CGM readings when they do not match symptoms
- Required for insulin dosing in some situations, especially on CGM warm-up days
- Appropriate for people with prediabetes or type 2 diabetes not on insulin who want occasional spot-checks
Choosing a Glucose Meter
Look for:
- ISO 15197:2013 compliance (listed on the box)
- Strip cost and pharmacy availability
- Required blood sample size (smaller is better)
- Bluetooth connectivity to a smartphone app
- Simple interface with large digits if you have vision concerns
- Reliable customer support and available lancets
Popular meters include the Contour Next, OneTouch Verio Reflect, Accu-Chek Guide, and pharmacy-brand store generics. Most health insurance plans cover one meter and some monthly strips; coverage terms vary.
Putting Meter Data to Work
Use your meter readings to identify patterns rather than obsess over single numbers. Look at morning (fasting), pre-meal, and 2-hours-post-meal trends over a week or two. Share the data with your doctor to adjust medications or lifestyle. Pairing meter data with diet and nutrition adjustments accelerates progress toward target A1C levels.
The Bottom Line
A glucose meter is a small, affordable device that measures your blood sugar from a drop of fingertip blood in seconds using an enzyme-based test strip. FDA-cleared meters are accurate within 15% of lab values in 95% of tests. Good technique — clean hands, fresh strips, adequate blood sample, correct storage — keeps readings reliable. Glucose meters remain a practical choice for people not using a CGM and a useful backup for those who are. Talk to your doctor about how often to test and how to act on the numbers.