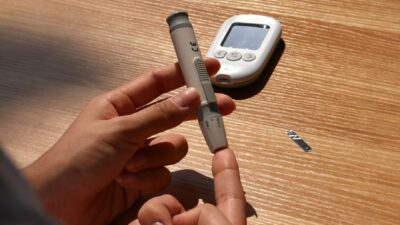
“Glucose drawing” is the informal term for collecting a venous blood sample and running a plasma glucose test. It is the standard laboratory method for diagnosing diabetes and prediabetes, distinct from fingerstick self-monitoring with a home meter. The draw itself takes 1 to 2 minutes and uses a small needle in a vein in the arm. ADA diagnostic cutoffs are based on venous plasma glucose.
What “Glucose Drawing” Actually Refers To
In clinical practice the phrase typically means one of:
- Fasting plasma glucose (FPG): a single venous draw after 8 to 12 hours without food
- Random plasma glucose (RPG): a single venous draw at any time, no fasting required
- Oral glucose tolerance test (OGTT): fasting draw, then drinking a 75-gram (2-hour) or 100-gram (3-hour) glucose solution, then draws at 1, 2, and 3 hours
- Basic metabolic panel (BMP) / comprehensive metabolic panel (CMP): includes plasma glucose as one of several measured values
Venous vs Capillary Glucose
| Feature | Venous Plasma Glucose (Draw) | Capillary Fingerstick (Meter) |
|---|---|---|
| Sample source | Vein in the arm | Fingertip |
| Sample size | 2 to 10 mL | 0.3 to 0.6 μL |
| Processing | Centrifuged to plasma; analyzed in lab | Enzymatic reaction on a test strip |
| Result time | 1 to 24 hours | 5 seconds |
| Used for | Diagnosis, monitoring in clinic and hospital | Daily self-monitoring |
| Accuracy | Gold standard | Accurate within ±15% of lab for most meters |
| Difference from lab plasma | Reference | Typically reported as “plasma-equivalent” already |
Diagnostic Cutoffs (Venous Plasma)
| Test | Normal | Prediabetes | Diabetes |
|---|---|---|---|
| Fasting plasma glucose | Under 100 mg/dL | 100 to 125 mg/dL | ≥ 126 mg/dL (repeated) |
| OGTT 2-hour | Under 140 mg/dL | 140 to 199 mg/dL | ≥ 200 mg/dL |
| Random plasma glucose | 70 to 140 mg/dL typical | — | ≥ 200 mg/dL with classic symptoms |
A1C ≥ 6.5% is also diagnostic but is a different blood test — not a glucose draw. See our guides on the random plasma glucose test and A1C levels.
How to Prepare for a Fasting Glucose Draw
- Fast for 8 to 12 hours before the draw
- Only plain water is allowed — no coffee, tea, juice, gum, mints
- Take prescription medications unless your clinician specifies otherwise
- Arrive hydrated — it makes the draw easier and improves reading accuracy
- Avoid strenuous exercise the morning of the draw
- Wear short sleeves or a shirt you can push up easily
For more detail, see our guide on drinking water before a glucose test.
Step-by-Step: What Happens During the Draw
- You sit in a chair, often with an armrest, at the lab.
- The phlebotomist verifies your identity and the test order.
- They choose a vein, typically in the inner elbow (antecubital fossa).
- A tourniquet is wrapped above the draw site to make the vein more prominent.
- The skin is cleaned with an alcohol wipe.
- A small needle is inserted; blood is collected into one or more vacuum tubes.
- The tourniquet is released, the needle is removed, and pressure is applied with gauze.
- A small bandage is placed over the site. Some labs ask you to keep pressure for a minute.
- The tubes are labeled and sent to the lab.
The whole process takes 1 to 5 minutes. Discomfort is typically a brief pinch or sting.
Special Case: The Oral Glucose Tolerance Test
For an OGTT, you:
- Fast overnight
- Have a fasting draw
- Drink a 75-gram (non-pregnant adults) or 100-gram (3-hour test in pregnancy) glucose solution within 5 minutes
- Stay seated in the lab
- Have additional draws at 1 hour, 2 hours, and for the 3-hour test, 3 hours
Only small sips of plain water are allowed between draws. No food, coffee, gum, or mints. See our detailed guides on the 1-hour pregnancy glucose screening for the screen that precedes a 3-hour OGTT.
What Affects Results
- Recent food or drink: biggest cause of elevated fasting results
- Stress, illness, infection: raise glucose temporarily
- Medications: glucocorticoids, some antipsychotics, thiazide diuretics, beta-blockers
- Dehydration: concentrates glucose; can push a borderline result over the threshold
- Sample handling: delayed processing in a warm tube lets red cells consume glucose, falsely lowering result
- Variant glucose enzymes on the lab analyzer: rare; reproducible with repeat
After the Draw
- Eat a balanced meal if you fasted
- Keep pressure on the site for 1 to 2 minutes to prevent bruising
- Avoid heavy lifting with the draw arm for a few hours
- A small bruise is common; persistent swelling or pain warrants calling the lab
- Results are usually available in 1 to 24 hours via patient portal or your clinician’s office
Potential Discomforts and Complications
- Small bruise (common; usually fades in 3 to 7 days)
- Brief lightheadedness (more common if fasting; sit or lie down)
- Minor localized soreness
- Rare: hematoma, nerve irritation, or infection (less than 1 in 1000)
Serious complications are very uncommon with standard venipuncture.
When to Call the Lab or Clinician
- Persistent bleeding from the draw site
- Large or expanding bruise
- Numbness, tingling, or weakness in the arm after the draw
- Redness, warmth, or swelling suggesting infection
- Fever
- Fainting that lasted more than a few seconds
Related Reading
See our companion guides on random plasma glucose, the glucose equation, and detection of prediabetes.
The Bottom Line
Glucose drawing — venous blood collection for a plasma glucose test — is the diagnostic gold standard for diabetes and prediabetes. Preparation depends on the specific test (fasting, random, or OGTT). The draw itself takes a minute or two, uses a small needle in an arm vein, and has very low complication risk. Results come back in 1 to 24 hours and are compared against ADA diagnostic cutoffs: fasting ≥ 126 for diabetes, 100 to 125 for prediabetes, plus the OGTT and random thresholds. Follow your lab’s prep instructions carefully — how well you fast is often the single biggest factor in an accurate result.