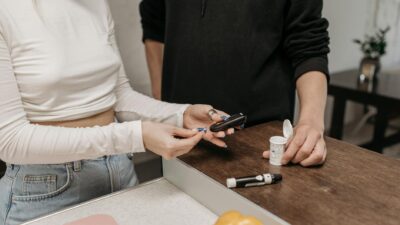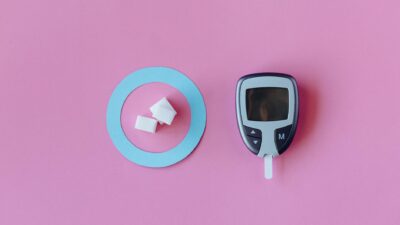
A glucometer is a small handheld device that measures the concentration of glucose in a drop of capillary blood, usually taken from a fingertip. It lets you check blood sugar at home in about five seconds and is the most common self-monitoring tool used in diabetes and prediabetes care.
What a Glucometer Is and Who Uses One
A glucometer — also called a blood glucose meter — pairs a reusable electronic reader with single-use test strips. You place a tiny blood sample on a strip, the meter measures an electrical signal, and a number appears on the screen in milligrams per deciliter (mg/dL) in the United States or millimoles per liter (mmol/L) elsewhere.
People with type 1 and type 2 diabetes have historically been the primary users, but meters are also used by individuals managing gestational diabetes, those on insulin or sulfonylureas, and many people exploring changes in response to a prediabetes diagnosis. If you want context for where your readings fit on the diagnostic spectrum, our overview of A1C levels pairs well with daily fingerstick data.
How a Glucometer Works
Most modern meters use an electrochemical method. The test strip contains an enzyme — typically glucose oxidase or glucose dehydrogenase — that reacts with glucose in the blood sample. That reaction generates electrons, and the meter measures the resulting tiny current. A built-in algorithm converts the current into a glucose concentration.
Older optical meters measured a color change on the strip instead, but they have largely been replaced by electrochemical models because the newer technology generally needs less blood and gives results faster. Either way, the strip chemistry only works when the meter, strip lot, temperature, and sample conditions are within the manufacturer’s specifications.
What the Sample Looks Like
A typical fingerstick sample is 0.3 to 1.0 microliter — roughly the size of a pinhead. Lancets on adjustable depth settings allow most people to get enough blood with minimal discomfort. Some meters are also cleared for alternate-site testing on the palm or forearm, though fingertip blood generally reflects current glucose levels more quickly than alternate sites.
Understanding Accuracy Standards
Glucometer accuracy is regulated. According to U.S. Food and Drug Administration guidance, meters for home use are expected to produce a result within 15% of a laboratory reference value for 95% of samples in the measurable range. International standards (ISO 15197:2013) use similar thresholds.
In practice, a meter reading of 120 mg/dL could correspond to a laboratory value anywhere from roughly 102 to 138 mg/dL and still be considered within spec. That is usually fine for tracking trends but explains why a single home reading is not used to diagnose diabetes.
| Factor | Effect on Reading | How to Minimize |
|---|---|---|
| Unwashed hands (food residue) | Falsely high | Wash with soap and water, dry completely |
| Alcohol wipe not dry | Falsely low or high | Let skin air-dry before lancing |
| Expired or heat-damaged strips | Unpredictable error | Store strips sealed at room temperature |
| Extreme hematocrit (anemia or dehydration) | Reading skew | Mention to your clinician when reviewing logs |
| Cold fingers, poor circulation | Sample too small, error codes | Warm hands before testing |
Features to Compare Before You Buy
Meters vary in cost, but the long-term expense often lives in the test strips rather than the reader itself. Before choosing a glucometer, consider how it will fit into daily life and what your insurance will cover.
- Strip cost and availability: A meter is only as useful as its supply chain. Check the per-strip price with and without insurance.
- Sample size: Meters that need only 0.3-0.5 microliter are easier for children, older adults, or anyone with poor circulation.
- Memory and averaging: Most meters store 300 to 1,000 readings and can display 7-, 14-, 30-, and 90-day averages.
- Smartphone sync: Bluetooth pairing with iOS or Android apps helps you spot trends and share logs with your clinician.
- Coding requirements: Prefer a “no-code” meter; strip miscoding is a classic source of error in older systems.
- Alternate-site testing: Useful if fingertip pain is a barrier to regular checks.
- Talking or large-display models: Designed for users with vision impairment.
Glucometer vs. Continuous Glucose Monitor
A continuous glucose monitor (CGM) uses a tiny sensor worn on the arm or abdomen to measure glucose in the fluid between cells every few minutes. Unlike a glucometer, a CGM shows trends and alarms overnight. It does not, however, eliminate the glucometer entirely for most people.
According to the NIDDK, many CGM users still keep a fingerstick meter for calibration, confirmation of rapidly changing values, or backup if the sensor fails. Which tool is primary for you depends on your type of diabetes, insurance coverage, and clinical preferences — a conversation worth having with your care team alongside a review of treatment options.
Getting the Most Accurate Reading
Technique matters as much as the hardware. The Centers for Disease Control and Prevention and the American Diabetes Association describe similar best practices for home glucose checks.
- Wash your hands in warm water and dry thoroughly. Do not rely on alcohol swabs alone.
- Insert a fresh strip, making sure the meter code (if required) matches the vial.
- Lance the side of a fingertip rather than the pad, where nerve density is higher.
- Gently encourage a drop — excessive squeezing can dilute the sample with interstitial fluid.
- Apply the drop to the strip’s target area and wait for the result, then log it.
If you repeatedly see readings that do not fit how you feel, run a control-solution test and review your technique before assuming the meter is broken. Consistently unexpected numbers are worth discussing with your clinician.
How Often to Test
Testing frequency is individualized. People using insulin commonly check before meals, at bedtime, and occasionally overnight, while those managing prediabetes or type 2 diabetes with lifestyle or oral medication may check less often. Targeted testing around meals or exercise can be more informative than random checks. For a sense of how daily numbers connect to longer-term control, it helps to compare fingerstick trends with your hemoglobin A1C and to review general prediabetes basics.
Caring for Your Meter and Strips
Keep the meter clean and dry. Wipe it with a soft cloth; do not submerge it or use harsh solvents unless the manufacturer explicitly allows. Store test strips in their original sealed vial at room temperature — heat, humidity, and bright light can degrade the enzyme chemistry. Note the “discard by” date once the vial is opened, which is often different from the printed expiration date.
The Bottom Line
A glucometer remains the simplest, most widely available way to check blood sugar at home. Modern meters are compact, accurate within well-defined FDA tolerances, and increasingly integrated with smartphone apps. Choosing the right one comes down to strip cost, sample size, sync options, and features that match your eyesight, dexterity, and testing routine. Readings are most useful when combined with a broader plan — diet, activity, medication, and periodic lab testing — that you build with a qualified clinician.