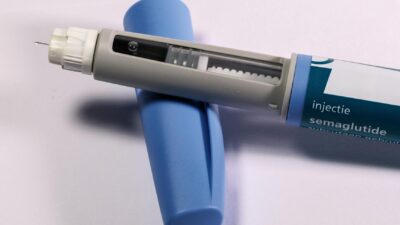
The FDA label for semaglutide approves three injection sites: the abdomen (avoiding 2 inches around the navel), the front of the thigh, and the back of the upper arm. Where to inject semaglutide matters less for absorption than how consistently you rotate sites and follow sterile technique.
Approved Injection Sites at a Glance
| Site | Where Exactly | Pros | Cons |
|---|---|---|---|
| Abdomen | 2+ inches from the navel, soft-tissue area | Easy to see and reach; large surface for rotation | Avoid stretch marks, scars, and tight waistbands |
| Front of thigh | Halfway between hip and knee, outer portion | Good self-access; easy to pinch a skin fold | Some users find the thigh more sensitive than the abdomen |
| Back of upper arm | Outer triceps area | Useful when abdomen or thighs are irritated | Hard to reach alone; usually requires a caregiver |
What “Subcutaneous” Means
Semaglutide is a subcutaneous injection, which means it goes into the fat layer just below the skin. The pre-filled pen is engineered with a short needle designed to reach this layer when used correctly. It should not be injected into a muscle or a vein. Injecting too deeply can change absorption and increase the risk of irritation.
Before starting, your prescriber, pharmacist, or a certified diabetes educator should walk you through the first injection. Most people feel comfortable after one or two supervised doses, but if your technique drifts over time, asking for a refresher is reasonable.
How to Rotate Sites Without Overthinking It
The goal of rotation is to avoid giving the same patch of tissue repeated injections, which can cause bruising, hardness, or lipohypertrophy. A simple approach is to use the same broad region (such as the abdomen) for several weeks while moving to a different quadrant each week, then switch to another region.
Many users find it easier to mark a simple notebook or phone reminder with the last site used. Whatever the system, consistency beats perfection. If you already manage prediabetes or type 2 diabetes with lifestyle changes, think of rotation as one more small habit that protects the benefits you are building through diet and nutrition and activity.
Sites and Situations to Avoid
The FDA label and patient instructions warn against injecting into areas that are bruised, tender, scarred, hard, red, or affected by skin disease. Also avoid injecting directly under a belt line, into stretch marks, or into tattoos. If your abdomen is sore from a prior dose, use the thigh or arm instead that week.
Other safety basics worth repeating: never share a pen or needle, even with a family member; use a fresh needle for every dose; and dispose of used needles in an FDA-cleared sharps container. Do not attempt to recap needles, and do not throw pens into regular household trash.
Step-By-Step Injection Reminder
The product Instructions For Use are the authoritative source; here is a general outline that aligns with the FDA prescribing information:
- Wash your hands and inspect the pen to confirm the medication is clear and colorless.
- Attach a new pen needle and prime if directed by the Instructions For Use.
- Choose an approved site and clean the area with an alcohol swab, letting it dry.
- Pinch a fold of skin, insert the needle straight in, and press the button until the dose window reads zero.
- Hold for the count listed in your product’s instructions, then withdraw the needle and discard it in a sharps container.
When to Call Your Clinician
Minor redness or a small bruise at the injection site is common and usually resolves within a few days. However, call your prescriber if you notice a hard lump that does not go away, spreading redness, severe pain, fever, or any signs of infection. Persistent nausea, vomiting, dehydration, or sudden severe abdominal pain are separate red flags that merit prompt medical attention regardless of injection site.
The Bottom Line
Where to inject semaglutide is less important than how you inject it. The abdomen, thigh, and upper arm are all FDA-approved sites. Rotate between them each week, follow your product’s Instructions For Use, and avoid any area that is bruised or irritated. If you are ever unsure about technique or a reaction, your prescriber or diabetes educator is the right person to ask.
Medical disclaimer: This article is for educational purposes only and does not replace medical advice. Always consult a qualified healthcare provider before starting, stopping, or changing any medication.