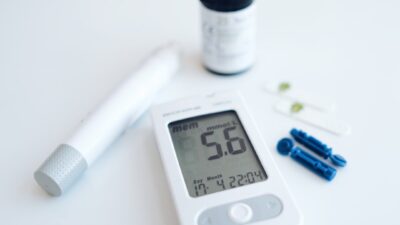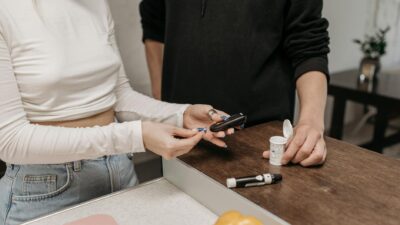
Dexcom G7 is FDA-approved for three wear sites — back of the upper arm (ages 2 and older), abdomen (adults only), and upper buttocks (children ages 2 to 6). The upper arm is the most commonly used site in adults due to practical advantages in accuracy, comfort, and ease of sensor changes. Avoid placement over scars, tattoos, moles, bony areas, or active skin conditions. Rotate between arms every 10 days to preserve skin integrity and reduce compression lows.
Approved Wear Sites
| Site | Approved For | Notes |
|---|---|---|
| Back of upper arm | Ages 2 and older | Most commonly used; good accuracy; least clothing interference |
| Abdomen | Adults only (18+) | Alternative to upper arm; check fit under clothing |
| Upper buttocks (upper outer quadrant) | Children ages 2 to 6 only | Easier for active kids; not approved for adults or adolescents |
Why Site Matters
- Different body areas have different subcutaneous tissue, blood flow, and interstitial fluid dynamics
- Sites with more reliable blood flow (upper arm, abdomen) produce more accurate glucose readings
- Areas with variable absorption (very lean areas, scar tissue) can give erratic data
- Clinical accuracy data (MARD 8.2 percent) is based on approved sites
- Off-label sites may work but lose FDA clearance accuracy claims and may void warranty
Back of Upper Arm (Default for Most Adults)
Advantages
- Easy to see during insertion
- Out of the way of most clothing
- Less likely to be pressed during daily activities
- Fewer compression lows from sleeping position
- Well-vascularized tissue produces accurate readings
How to Apply
- Locate the fleshy area between the shoulder joint and elbow, on the back-outer side
- Clean with soap and water, then alcohol wipe; let dry completely
- Remove applicator cap
- Place applicator flat against the skin with arrows pointing down
- Press the button firmly to insert
- Pair with your phone or receiver via the Dexcom app
- Wait 27 minutes for sensor warm-up
Abdomen (Alternate Adult Site)
When to Use
- Upper arm irritation or adhesive issues
- Alternating sites to give arm skin recovery time
- Very active upper-body workouts (weightlifting, climbing)
- When upper arm has scars, tattoos, or bony areas that rule it out
Where Specifically
- At least 2 inches from the navel
- Away from waistband or belt line (friction)
- Away from hip bones
- Avoid the exact same spot as any prior injection or insulin pump site
Upper Buttocks (Children Ages 2 to 6 Only)
Why Used
- Harder for young children to pull off
- Less visible to playmates at daycare or school
- Fewer hand-to-sensor touch opportunities
Where Specifically
- Upper outer quadrant of the buttock
- Above where a child sits
- Avoid the diaper area in young children
What to Avoid When Choosing a Site
- Scars or stretch marks (absorption is unreliable)
- Tattoos (the ink can interfere with the filament)
- Moles, freckles, or other skin lesions
- Bony prominences (the elbow, hip bones, shoulder blade)
- Areas under tight clothing bands (waist band, bra strap, belt)
- Areas with active infection or inflammation
- Areas of recent injury or bruising
- Areas of lipohypertrophy from repeated injections
- Veins or varicose areas
- The side you sleep on most (compression lows)
Rotation Strategy
- Alternate arms every sensor (10 days)
- Within each arm, slightly shift position from previous placement
- Keep a simple log of which arm was used when
- If alternating abdomen and arm, track the cycle
- Give each specific spot at least 4 to 6 weeks to recover before reuse
Compression Lows and Sleep Position
Compression lows are false low readings caused by sleeping on the sensor or pressing against it. Prevention:
- If you sleep on your left side, wear sensor on right arm
- If you sleep on your right side, wear sensor on left arm
- If you sleep on your back or alternate, either arm works; rotate based on which arm was used last
- Wear a loose T-shirt to prevent direct pressure
- Keep a body pillow between arm and bed if needed
- Confirm any suspicious nighttime low with a finger stick before correcting
Common Placement Mistakes
- Placing on the front of upper arm (lacks adequate subcutaneous fat)
- Too close to elbow (bony area, bends a lot)
- Near shoulder joint (high movement)
- On love handles or exact hip crease (clothing friction)
- On scar tissue from prior sensors or injections
- Directly on a mole (the ink or pigment interferes)
- Under a tight bra strap or band
- In a tattoo (both for interference and aesthetic)
Skin Preparation for Best Adhesion
- Wash the site with soap and water
- Pat dry thoroughly
- Wipe with alcohol swab; let dry completely
- Optional: apply a Skin-Tac or Mastisol wipe for extra adhesion (especially for sweaty or oily skin)
- Avoid lotion or moisturizer on the site for at least 2 hours before application
- If you have hair, trim (do not shave — freshly shaved skin is more prone to irritation)
Troubleshooting Site Issues
| Problem | Solution |
|---|---|
| Sensor keeps falling off | Use an overpatch; prep with Skin-Tac; rotate to cleaner skin |
| Skin irritation/rash | Try Flonase prep; hypoallergenic overpatch; barrier film (Cavilon) |
| Early sensor failure | Check placement; avoid bony areas and scars; ensure 27-min warm-up |
| Frequent compression lows | Switch to opposite arm from sleeping side |
| Readings off vs finger stick | Check placement; avoid dehydration; let sensor warm up fully |
Related Reading
See our guides on detection of prediabetes, how Dexcom G7 works, and Dexcom 7 sensor overview.
The Bottom Line
Dexcom G7 sensor placement is FDA-approved for the back of the upper arm (ages 2 and older), abdomen (adults), and upper buttocks (children ages 2 to 6). The upper arm is the most common adult choice due to accuracy, comfort, and convenience. Avoid scars, tattoos, moles, bony areas, and tight clothing bands. Rotate between arms each sensor change; choose the arm opposite your sleeping side to reduce compression lows. Prep skin thoroughly and consider an overpatch for athletes or heavy sweaters. Stick to approved sites — off-label placement risks inaccurate readings and warranty issues.